Gameboy Revival
|
- gameboy
- retrobright
Introduction
During the pandemic, my parents cleaned the attic and discovered some of my childhood electronics and games - including my Gameboy. They sent it with the next care package, and I tried to resurrect one of my childhood memories.
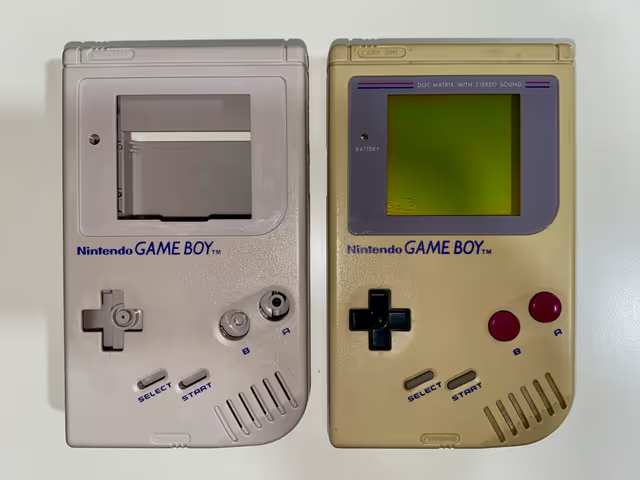
I inserted a set of freshly charged batteries, slid in the original game - Tetris - it came with, and turned it on. The power light turned a bright red, the Nintendo logo started to appear on the display, and it welcomed me with the iconic “ding” sound. The Gameboy still worked, but it showed its age after all these years. It has ripened like a banana to a dark yellow color, the display protector is falling off, and the dot matrix display has dead lines.
Initially, I felt discouraged as I believed I would need to replace the display. Then Youtube came to the rescue and lightened my mood. The dead dot matrix display lines were a known issue with a simple fix. The Youtube algorithm also exposed me to Retrobright’ing, which reverses the yellowing in older plastic products.
Restoring the outer shell
First, I bought the iFixit toolkit, which includes special Tri-point bits for the Gameboy screws. I carefully disassembled the outer shell and cleaned it well with soapy warm water and a toothbrush. In the meantime, I also received my 12% Hydrogen Peroxide order. I placed the yellow outer shell in a big ziplock bag and filled it with undiluted 12% Hydrogen Peroxide (always read the safety warnings and wear protective gear). I put the bag into the sun for the day, but unfortunately, it was overcast. I kept on checking throughout the day, and I could see little progress. The yellow started to fade away, but it needed more time. The next day was full of sun, and the yellow entirely disappeared. I successfully restored the shell to its original gray color. It looked like it was brand new.
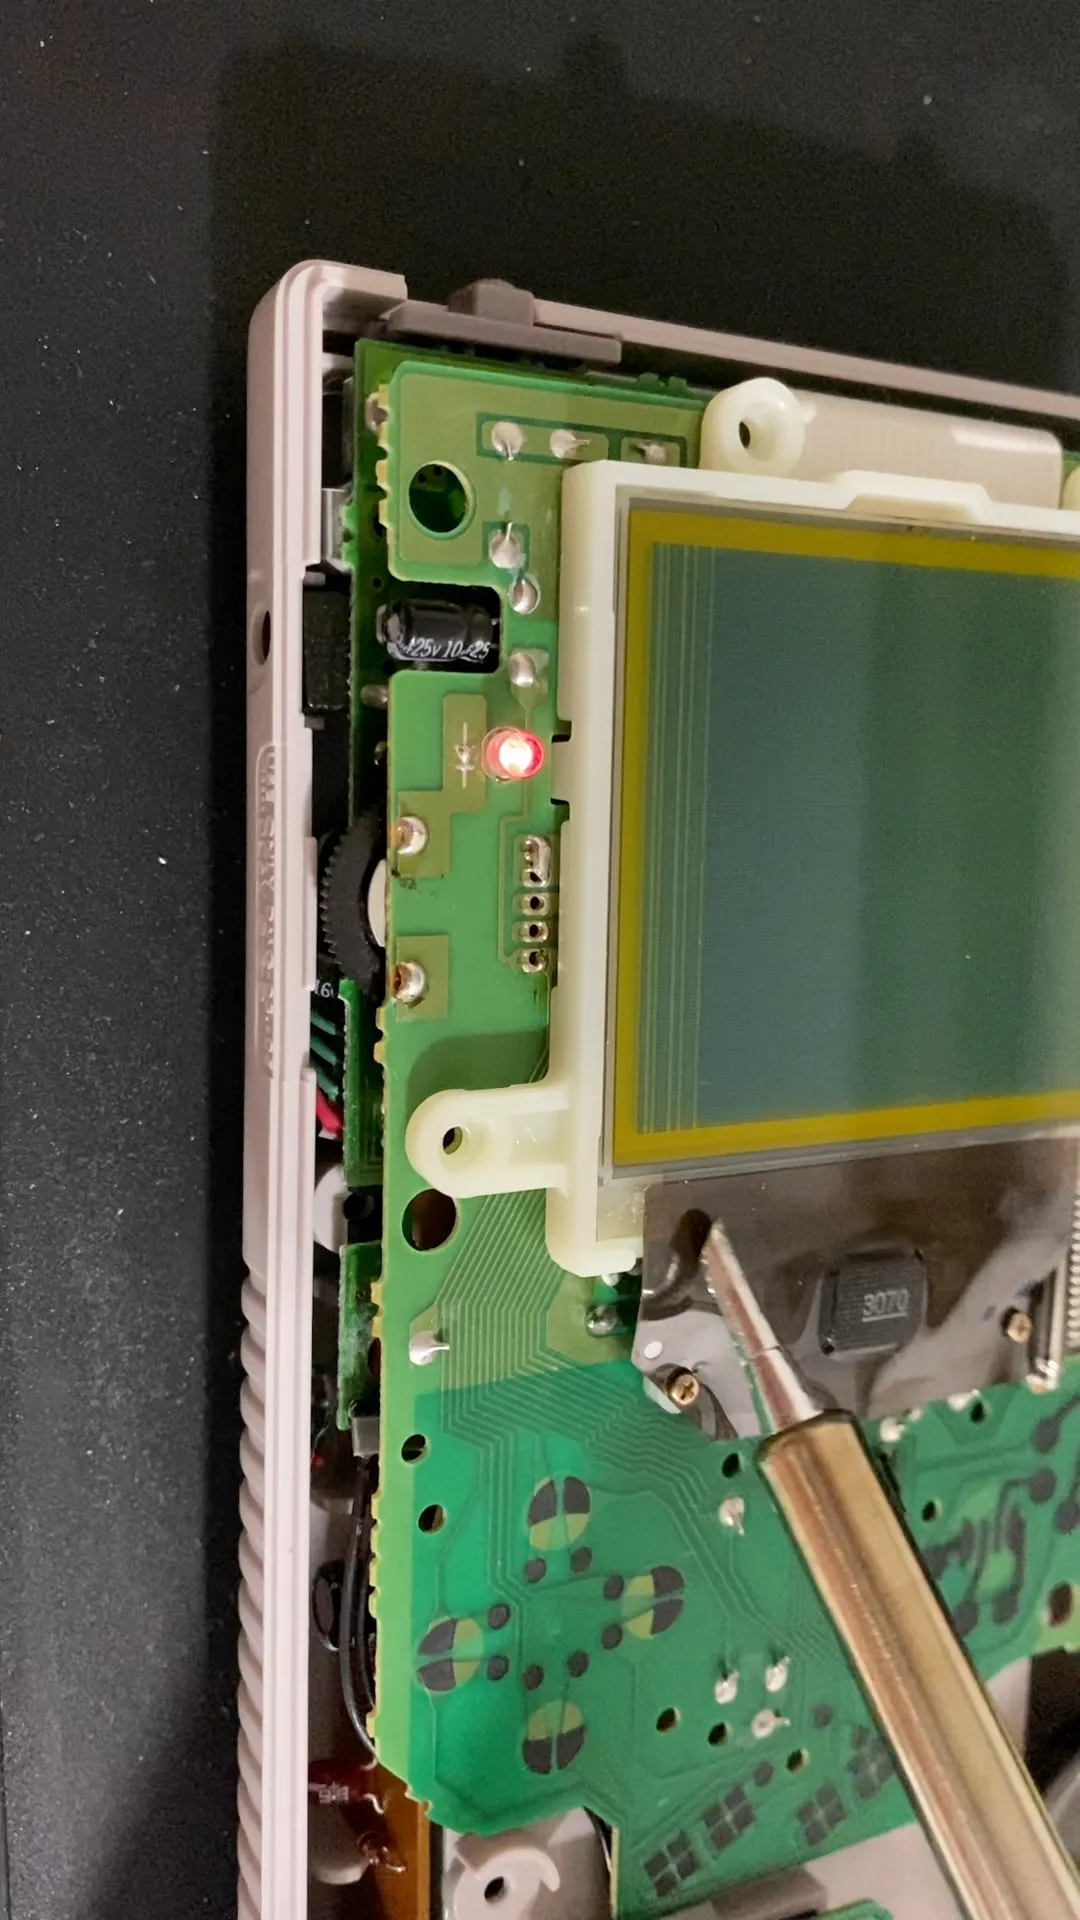
Fixing the dot matrix display
The problem with dead lines in the dot matrix display is not the display itself but with the connector cable. Over time, the connection between the dot matrix display and the cable can weaken and break. To fix this, you can use a soldering iron to heat the solder point on the cable carefully. First, turn on the Gameboy without a game and increase the contrast so the display turns black. Then start heating the area or areas where the lines are not working. Please don’t leave the iron too long in the same spot and keep moving it forth and back. This process requires patience because lines switch between working and not working. The procedure took me 20-30 minutes, so don’t give up after just a few minutes.
Reassembly and test run
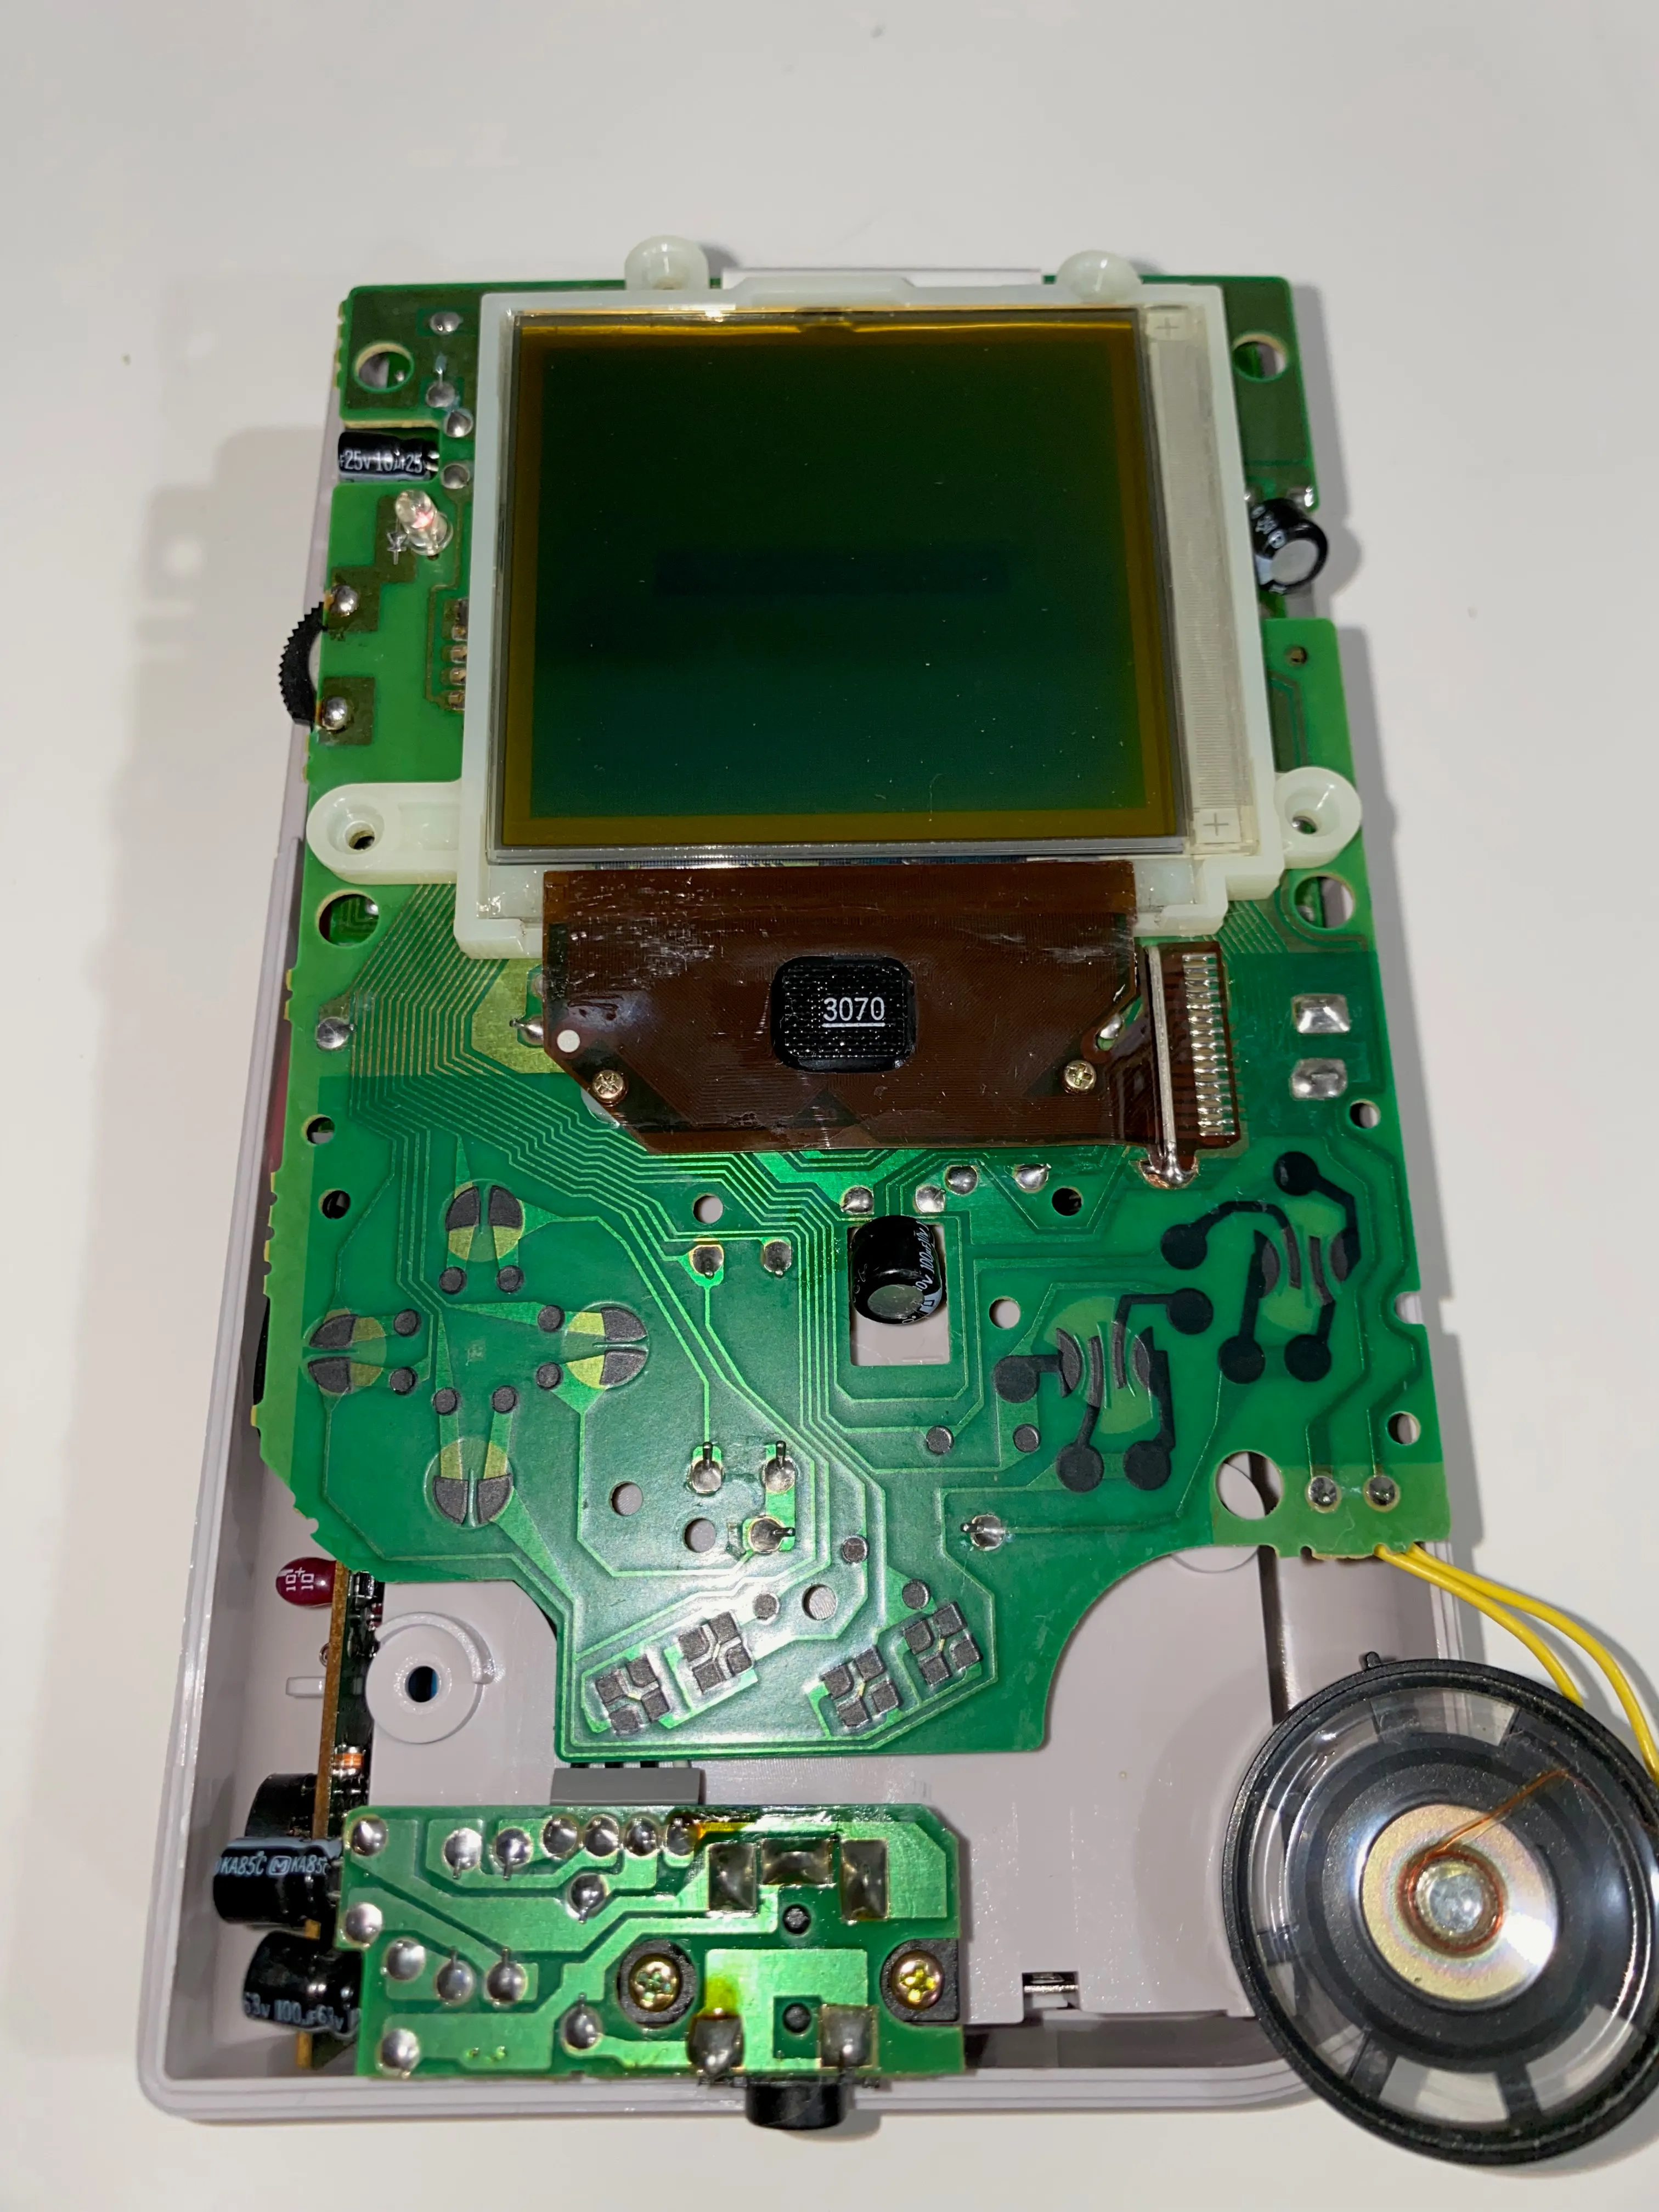 I cleaned all the internal components with isopropyl alcohol and reassembled all the pieces. Nintendo is even helpful by marking the one hole on the PCB board that is not for screws, but it is always best to take pictures beforehand and sort and catalog the pieces. I should have been more diligent, so I looked at other guides to ensure I assembled everything again as intended. In the process, I also bought a replacement for the display cover and upgraded to a glass cover. Now is the moment of truth - will it work?
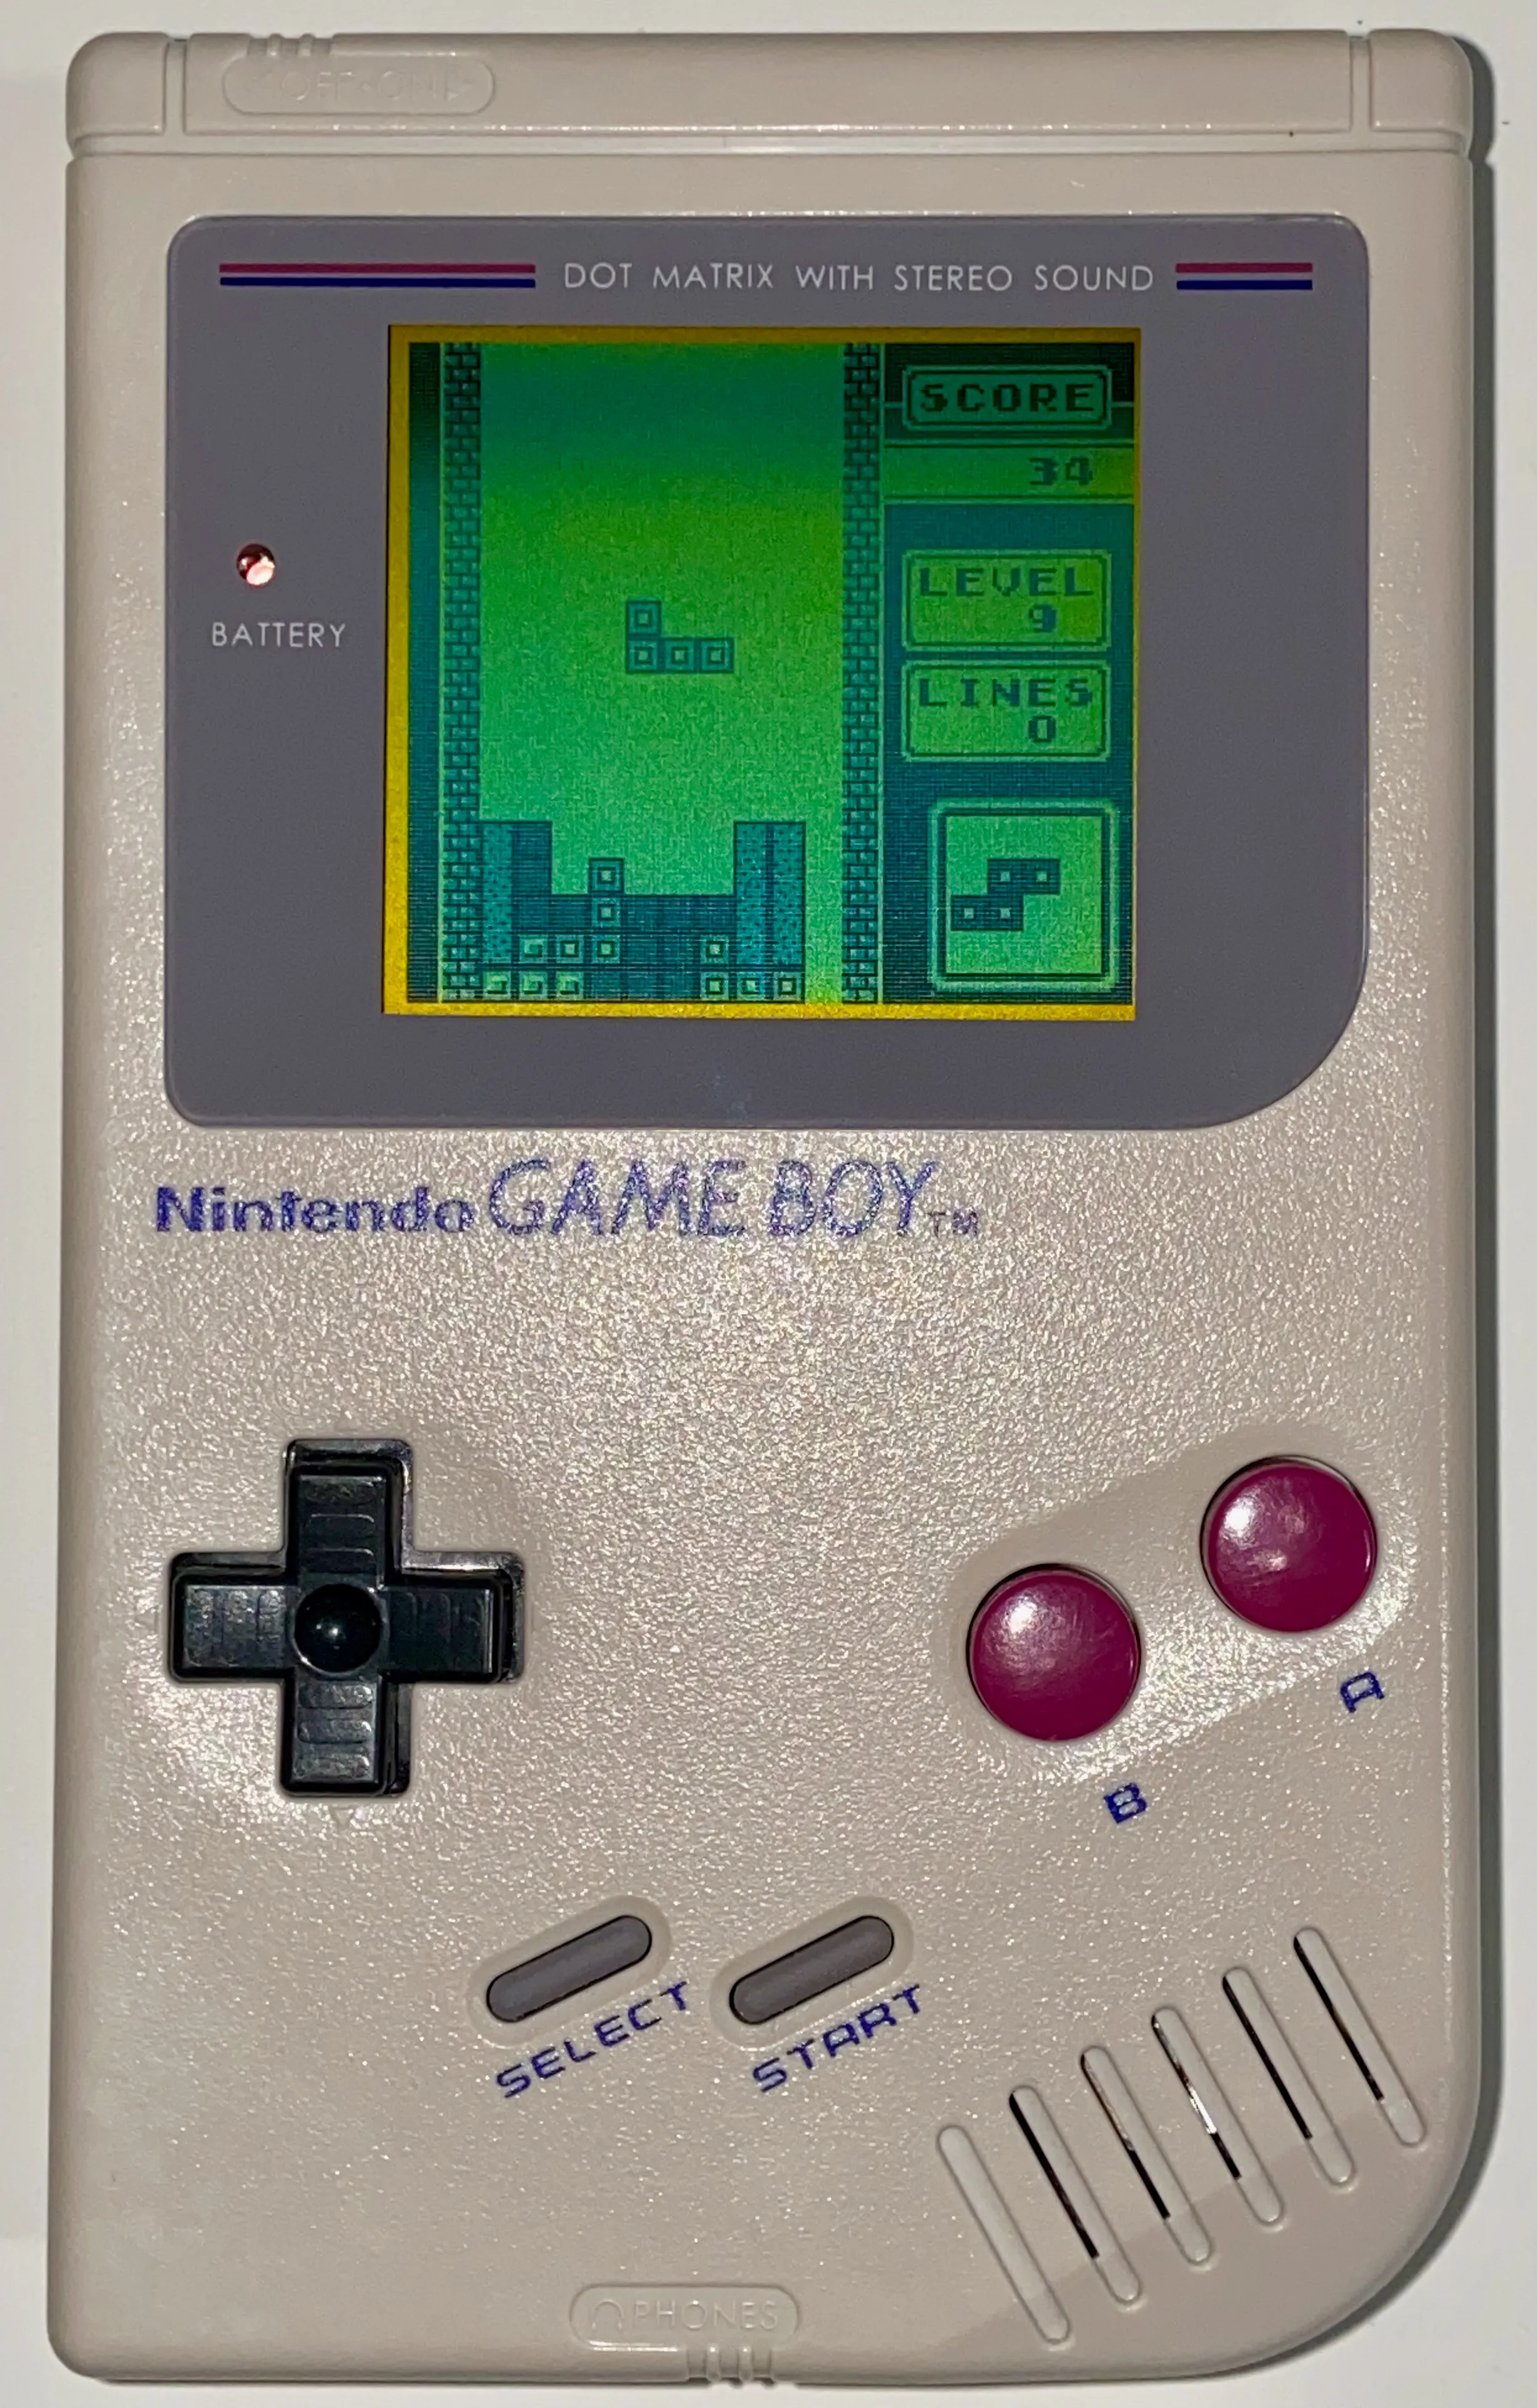
It is alive 😌